|
|
|
Kto jest w sklepie?
Sklep przegląda 5987 gości |
|
Kategorie
|
|
Informacje
|
|
Polecamy
|
|
|
 |
|
|
Dla tego produktu nie napisano jeszcze recenzji!
 ;
...instruction is ok.
...instrukcja jest ok.
Thanks/Dzięki
;
Documentation made available quickly and It is good quality. Thanks.
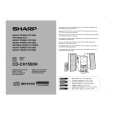
CD-CH1500H/CD-CH1500W
Speaker System
CP-RW5500H/CP-RW5500W
1. Woofer 2. Tweeter 3. Subwoofer 4. Subwoofer Terminals 5. Main Speaker Terminals 6. Bass Reflex Duct
1
2
4 5
3 6
OPERATION MANUAL
Setting the Clock
5
Turn the jog dial to adjust the hour and within 2 minutes, press the ENTER button.
When the 12-hour display is selected, "AM" will change automatically to "PM".
6
Turn the jog dial to adjust the minutes and within 2 minutes, press the ENTER button.
In this example, the clock is set for the 24-hour (0:00) display.
The hour will not advance even if minutes advance from "59" to "00". The clock starts from "0" second. (Seconds are not displayed.) The time display will disappear after a few seconds. To confirm the time display: [When the unit is in the stand-by mode] Press the DISPLAY button on the remote control. The time display will appear for about 3 seconds. [When the power is on] Press the MENU button. The time display will appear for about 10 seconds. Note: "CLOCK" will appear or time will flash at the push of the DISPLAY button when the AC power supply is restored after a power failure or unplugging the unit. Reset the clock as follows. To reset the clock: [When time is flashing] 1 Press the ON/STAND-BY button. 2 Press the MENU button. 3 Press the ENTER button. 4 Perform "Setting the Clock" from step 5. [When "CLOCK" appears] Perform "Setting the Clock" from the beginning. To change the 24-hour or 12-hour display: 1 Clear all the programmed contents. [Refer to "Clearing all the memory (reset)".] 2 Perform "Setting the Clock" from the beginning.
1 2 3
Press the ON/STAND-BY button to turn the power on. Press the MENU button. Turn the jog dial to select "CLOCK" and within 10 seconds, press the ENTER button.
4
Turn the jog dial to select the 24-hour or 12-hour display and within 2 minutes, press the ENTER button.
"0:00" "AM 12:00" "AM 0:00"
The 24-hour display will appear. (0:00 - 23:59) The 12-hour display will appear. (AM 12:00 - PM 11:59) The 12-hour display will appear. (AM 0:00 - PM 11:59)
Note that this can only be set when the unit is first installed or it has been reset. [Refer to "Clearing all the memory (reset)".]
�8�
|
|
|
> |
|